GP Connect - PCN Shared Service
GP Connect - PCN Shared Service
Within a service group a single host practice should be decided, and it is there that the appointments are made on the clinical system.
A GP Connect Group & User should be created for each service
Steps 1-5 should be done only at the “Host” practice.
Steps 6 & 7 – To be done by all the other sites in the group (NOT the host site)
Appointment sessions can alternatively be created in Appointment Book>Week Templates and a Week created and added to Appointment Book>Planner if the service is running on multiple days in the week BUT it is IMPORTANT that Steps 3-5 are followed.
NB: A smartcard should be logged in to use GP Connect
1) Organisation Configuration
Check GP Connect is fully set up
1.1) Navigate to Emis Ball>OrganisationConfiguration>Organisation>Click the name of your practice and Edit>GP Connect Configuration. Ensure all the boxes are ticked.
2) Set up organisation group for the service
**It is recommended you set a group up for each “service” that you are setting up**
2.1) Navigate to EMIS Ball > Configuration > Organisation Configuration > Organisation Groups
2.2) Click Add on ribbon - the Add Organisation Group screen is displayed (as pictured below).
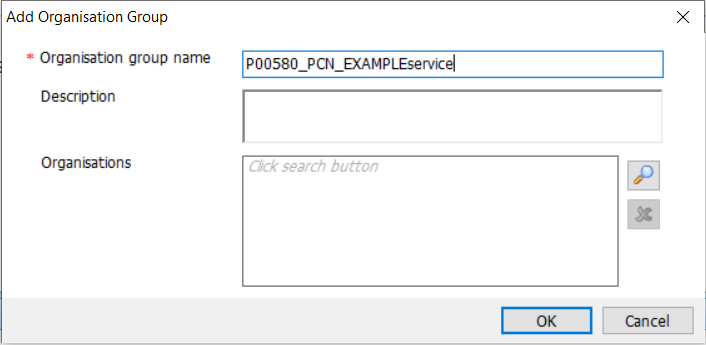
2.3) Enter your Organisation Group Name in the format of Your ODS Code_PCN_EXAMPLEservice
2.4) Click the magnifying glass, type your ODS Code, press search and double-click your practice.
2.5) In the same ‘Find organisation…’ box, type each of the list of codes in Appendix A, followed by enter, then double-click each of the results in turn – repeat this process for all 20 codes.
2.6) You should be left with the number of practices included in the service plus your own in the lower “Selected Items” box.
2.7) Click Ok to create the group.
NB – Ensure the group is “Subscribed”
3) User Configuration
Ensure that you have a user set up (this would be the person who will be seeing the patients or a dummy user).
NB – The user should be set as one of the Clinical Practitioner role profiles to allow GP Connect set-up
4) Create Slot Type
4.1) Navigate to EMIS Ball > Appointments > Appointment Book.
4.2) Click on ‘Appts Config’ button from the ribbon.
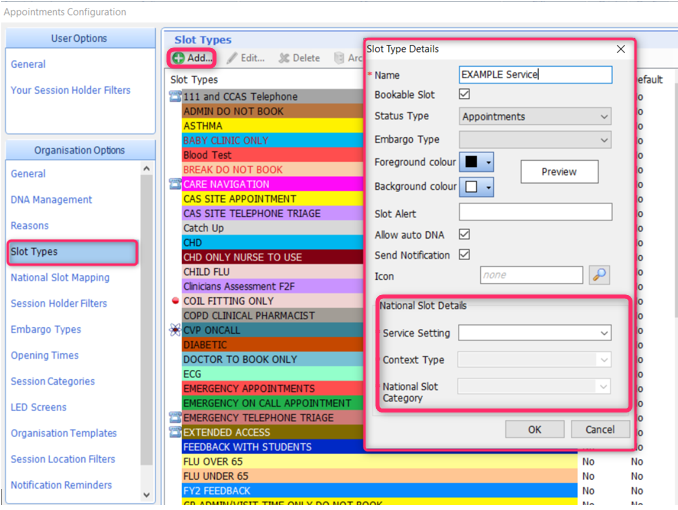
4.3) Click on ‘Slot Types’ and add a new slot type.
* please note you can’t use symbols like & or + when creating a slot type
5) Appointment Session Creation
PLEASE NOTE: Please refer to screenshot further down for each of the steps below
5.1) Navigate to EMIS Ball > Appointments > Appointment Book
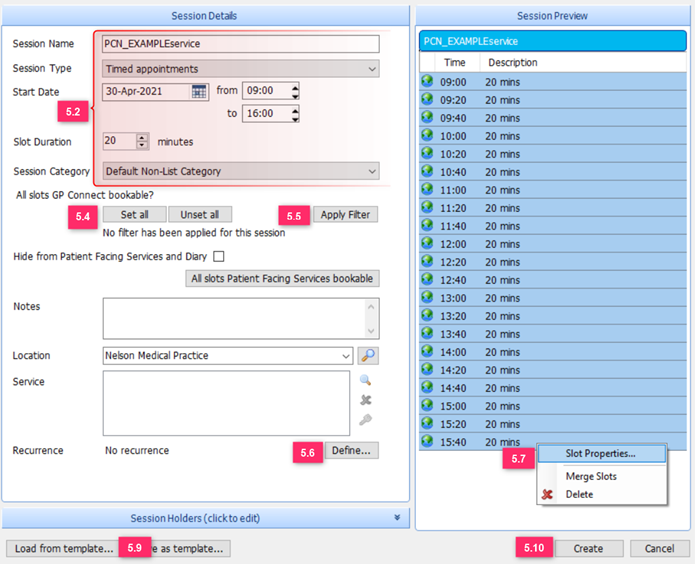
5.2) Click Create Session, then create a new one using the following parameters –
- Session Name: PCNEXAMPLEservice
- Session Type: Timed Appointments
- Appointment Times: Appointment slot timings
- Start Date: Immediate (today)
- Slot Duration: Length in time of the appointment
- Session Category: Default Non-List Category
5.3) Add the “Session Holder” (this is the user created for this session actual or dummy as per Step 3. User configuration

5.4) Return to ‘Session Details’ and Click ‘Set all’ under ‘All slots GP Connect bookable’ The globe icon will appear next to each timed slot
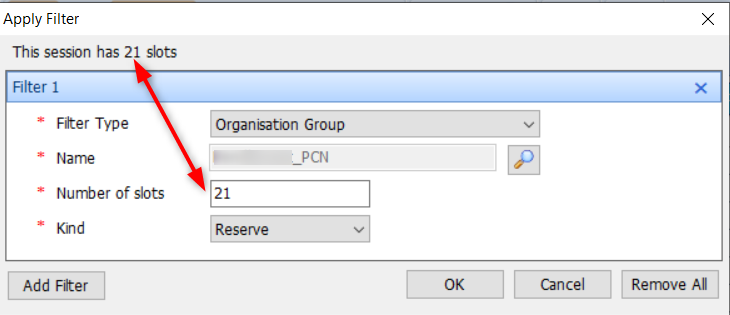
5.5) Click ‘Apply filter’ – and use the following parameters (then click OK).
- Filter Type: Organisation Group.
- Name: Select the group created in Stage 2.
- Number of slots: Use the number at the top of the box.
- Kind: Reserve.
Click OK & continue creating session.
5.6) Set the ‘recurrence’ (‘define’ button) to every day the session will be available. Choose if you want to add an end date.
5.7) Highlight all the slots in the right-hand side, right-click and select ‘Slot Properties’
5.8) Choose the ‘slot type’ as created in section 4, then click Apply and close
5.9) Click ‘Save As Template’ and click OK
5.10) Click ‘Create’ to apply these sessions to the appointment
6) Subscribe to Organisation Group - ALL OTHER SITES IN GROUP
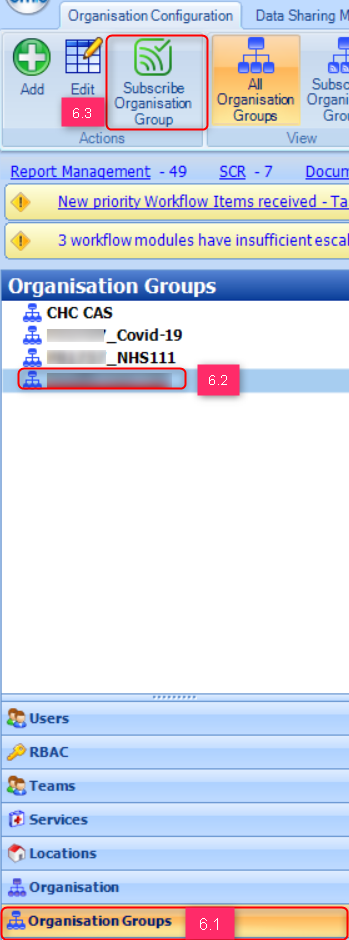
6.1) Navigate to EMIS Ball > Configuration> Organisation Groups
6.2) Select the Group in the left hand Column
6.3) Click Subscribe to Group
7) Book an Appointment for a GP Connect Service – (ALL sites EXCEPT Host)
7.1) Navigate to EMIS Ball > Appointments > Appointment Book
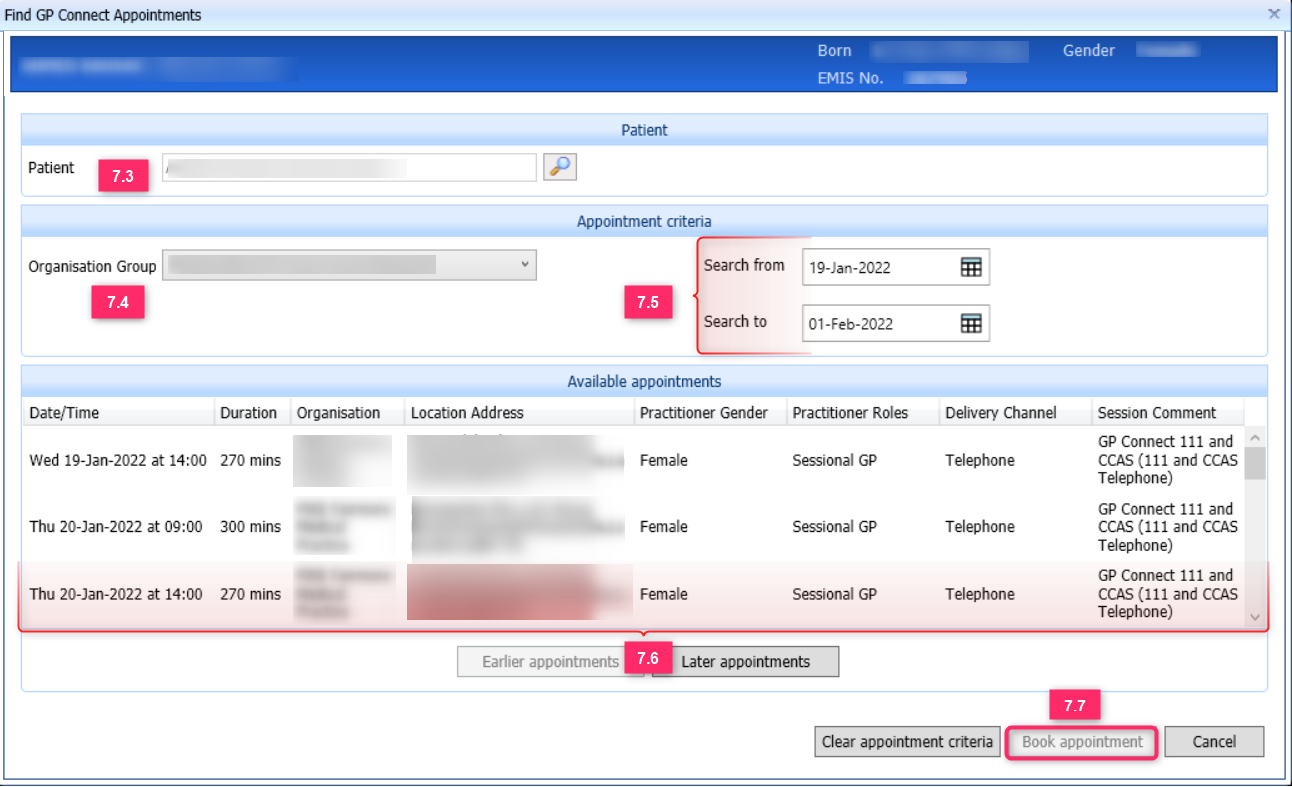
7.2) Click Find Slot>Find GP Connect Appointments
7.3) Patient: Find patient you want to book appointment for.
7.4) Organisation Group: Select Organisation Groups created in Stage 2.
7.5) Select specific date parameters to search for appointments in that range.
7.6) The system will load available appointments for you to choose from.
7.7) Select an agreed appointment date and click Book Appointment.
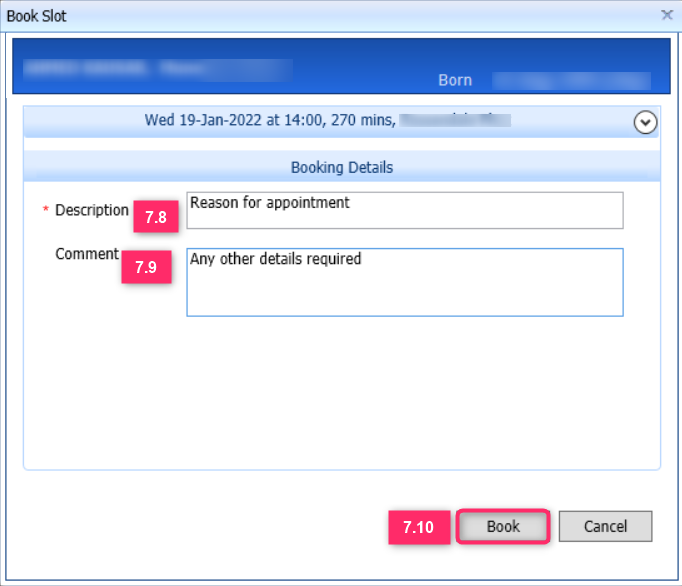
7.8) Description: Add a reason for the appointment.
7.9) Comments: Add any further comments about the appointment.
7.10) Select Book to confirm booking the appointment.
Use Patient Appointments>GP Connect Appointments to check appointment time or cancel the appointment. You can also copy the appointment details and paste into a consultation (must use ctrl C & ctrl V
8) View patient's GP record
Sharing patient data enables clinicians from other healthcare organisations using GP Connect, to be able to view a patient's GP record and provide treatment.
However to be able to do this a data sharing preference should be recorded in the patients record (at the patients registered GP practice).
Consent given for upload to local shared electronic record (SNOMED CT 417528008)
This could be done at the point of booking the GP Connect appointment and/or including this within your registration process.
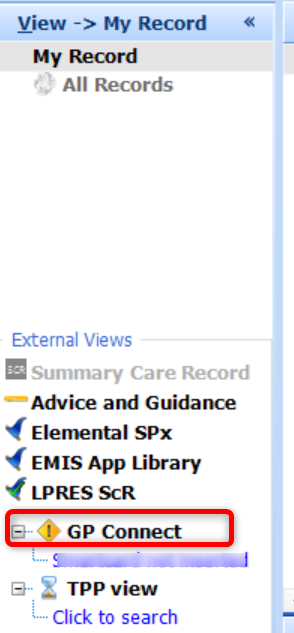
Once you have this you will have access a GP Connect Shared record using the View->My Record pane in Consultations