
MS SharePoint - Joiners and Leavers (ML staff)
Follow the MS SharePoint – Open a SharePoint Site (ML staff) guide on how to sign in to SharePoint on the web.
Only owners of a SharePoint site will be able to add and remove users.
The IT training team are here to support the process of how to review permissions and to assist you to understand permissions management. Information Governance support (including records management) is provided by the Information Governance team. Therefore, you may find references to additional Information Governance guidance and support throughout this document.
Joiners – Add a user to a SharePoint site
Access the SharePoint site and click Members in the top right of your SharePoint window.
From the Group membership pane, click the Add members button.
Type the users name or email address and click the name when it is displayed. For this example we are search for Test IT Trainer.
The user will be listed under the heading 1 member to be added and the role is set by default as Member. Click the down arrow next to Member if you want to change the role to Owner.
You can change the roles for member and owners. You can change a member to become an owner or vice versa.
When making any changes to roles careful consideration is required. Not all employees (or individuals with access to the site) should have access to all data and therefore if you are changing the owner of folder, they will have access to all data that sits underneath the top level, should they have this access?
Locate the person whose permissions are to be modified, paying particular attention to the name as
there may be several contacts or named individuals with the same name and therefore should the incorrect person be selected by mistake an information governance breach may occur.
Click the Save button to confirm the changes.
The newly added user will then appear in the Group membership list. Again, by default the newly added user will be set up as a Member. Should this need to be changed, click on the arrow next to Member and change their role to Owner.
Click the X to close the Group membership window.
Add a user to a Document Library
Follow the MS SharePoint – Set permissions on a document library guide for further information.
Select the Document Library on the left of the window you want to change the settings for and click the Settings button at the top right. Click Library settings from the list. for this example we have selected the Admin document library.
Click the link More library settings.
Click Permissions for this document library under the heading Permissions and Management.
The Permissions window will be displayed. For the Admin document library only the Owners have access to the content. To add a user, click the Grant Permissions button on the ribbon.
Type in the users email address or name to search. Click the name from the list. For this example we are searching for Test IT Trainer.
You may also want to include a personal message which is optional. To set the permission level, click SHOW OPTIONS.
The default permission level is set to Edit. Click the down arrow at the end of the box displaying Edit and select a different permissions level.
- Full Control – has full control
- Design – can view, add, update, delete, approve and customize
- Edit – can add, edit and delete lists, can view, add, update and delete items and documents
- Contribute – can view, add, update and delete items and documents
- Review – can view and review list items and documents
- Read – can view pages and list items and download documents
- Restricted view – can view pages, list items, and documents. Documents can be viewed in the browser but not downloaded
For this example we will leave the permission level as Edit.
Remove the tick from the option Send an email invitation if required, for this example we have removed it and click the Share button.
You will need to press the function key F5 on the keyboard to refresh the page to view the changes We can now see that Test IT Trainer (ML) has been given access.
Click Home on the left side of the window to return to the SharePoint home page.
Add a user to a Folder
Select the document library and the left of the SharePoint site and click on the 3 dots next to the folder you want to add the user to. Click Manage Access from the list.
For this example we have selected the GP staff document library on the left and the GP Staff Rotas folder.
The Manage Access dialog box will be displayed. Click the Grant Access button in the top right of the box.
The Grant access dialog box will be displayed. Click the permissions button, and select a permissions form the list. The default option is Can edit.
You can select from one of the following options:
- Can edit – make changes
- Can view – Can’t make changes
- Can’t download - Can view, but not download
For this example we will leave the option as Can edit.
Click in the To box and start to type the name of the user or email address for the user you want to give access to the folder.
Select the user from the list. For this example we have searched for Test IT Trainer.
The user will be displayed at the top of the Grant access box. Click the Grant access button to confirm.
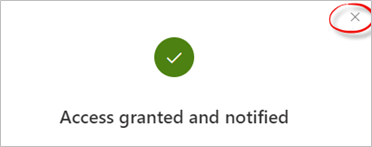
A confirmation message Access granted and notified will be displayed. Click the X in the top right corner to close the box.
You can check if the user has been added, click the 3 dots next to the folder name and click Manage access.
The Manage Access box will be displayed, and the user will be added to the People section.
Leavers – Remove a user from SharePoint site
Access the SharePoint site and click Members in the top right your SharePoint window.
Find the user, click the down arrow next to member and click Remove from group in the list.
The user will be automatically removed from the SharePoint site.
Remove a user from Document Library
Select the Document Library on the left of the window you want to change the settings for and click the Settings button at the top right. Click Library settings from the list. For this example we have selected the Admin document library.
Click the link More library settings.
Click Permissions for this document library under the heading Permissions and Management.
The Permissions window will be displayed. Click the tick box next to the user you want to remove and click the Remove User Permissions button on the ribbon. For this example we have selected the user Test IT Trainer (ML).
A confirmation message with the text You are about to remove all permissions for the following user or group to “Admin”: Test IT Trainer (ML) will be displayed at the top of the window. Click the OK button.
The user will be removed from the permissions list. Click Home on the left side of the window to return to the SharePoint home page.
Remove a user from a Folder
Select the document library and the left of the SharePoint site and click on the 3 dots next to the folder you want to add the user to. Click Manage Access from the list.
For this example we have selected the GP staff document library on the left and the GP Staff Rotas folder.
The Manage Access box will be displayed. The users that have access to the folder with will be displayed in the People section including the sharing permissions you have set. For this example in the Test IT Trainer (ML) Can edit the contents of the folder.
Click the users name, the Access summary box will be displayed. Click the down arrow to the left of the text Direct Access: can edit and click the Can edit button.
Select Remove direct access from the list.
A confirmation message with the text Want to remove Test IT Trainer (ML)’s direct access? Click the Remove button to confirm.
The user will be removed from the People section. Click the X in the top right corner to close the Manage Access box.
Additional Guidance
Please refer to the User & Video Guides or the Microsoft 365 page for on the MLCSU Academy for additional guidance.
Please contact the MLCSU IT Training Team if you need any further help. Email: mlcsu.academy@nhs.net